Edit Employee Payroll Data
If it's necessary to edit employee payroll data before running the payroll process, on Payroll > Payroll Master Data > Employee Payroll Data, click the intended employee number under the Employee No. column. 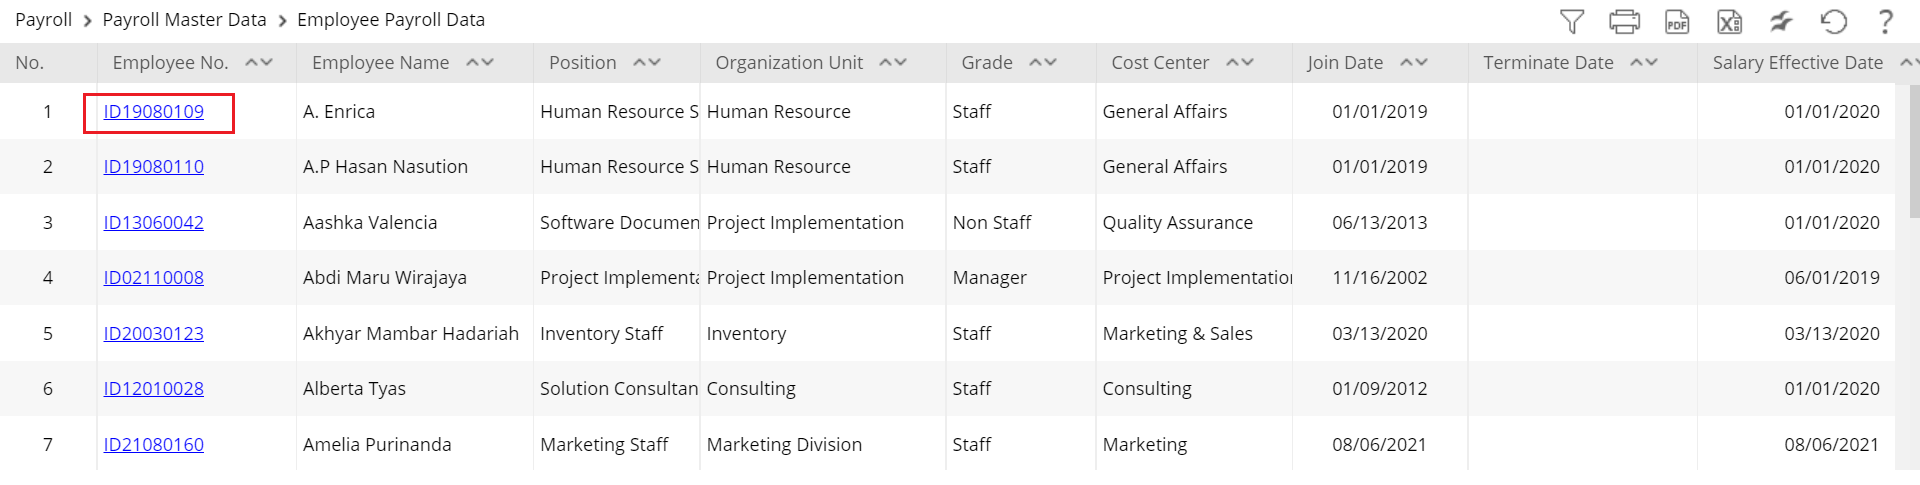
Then, the Edit Employee Payroll Data page will appear as follows:
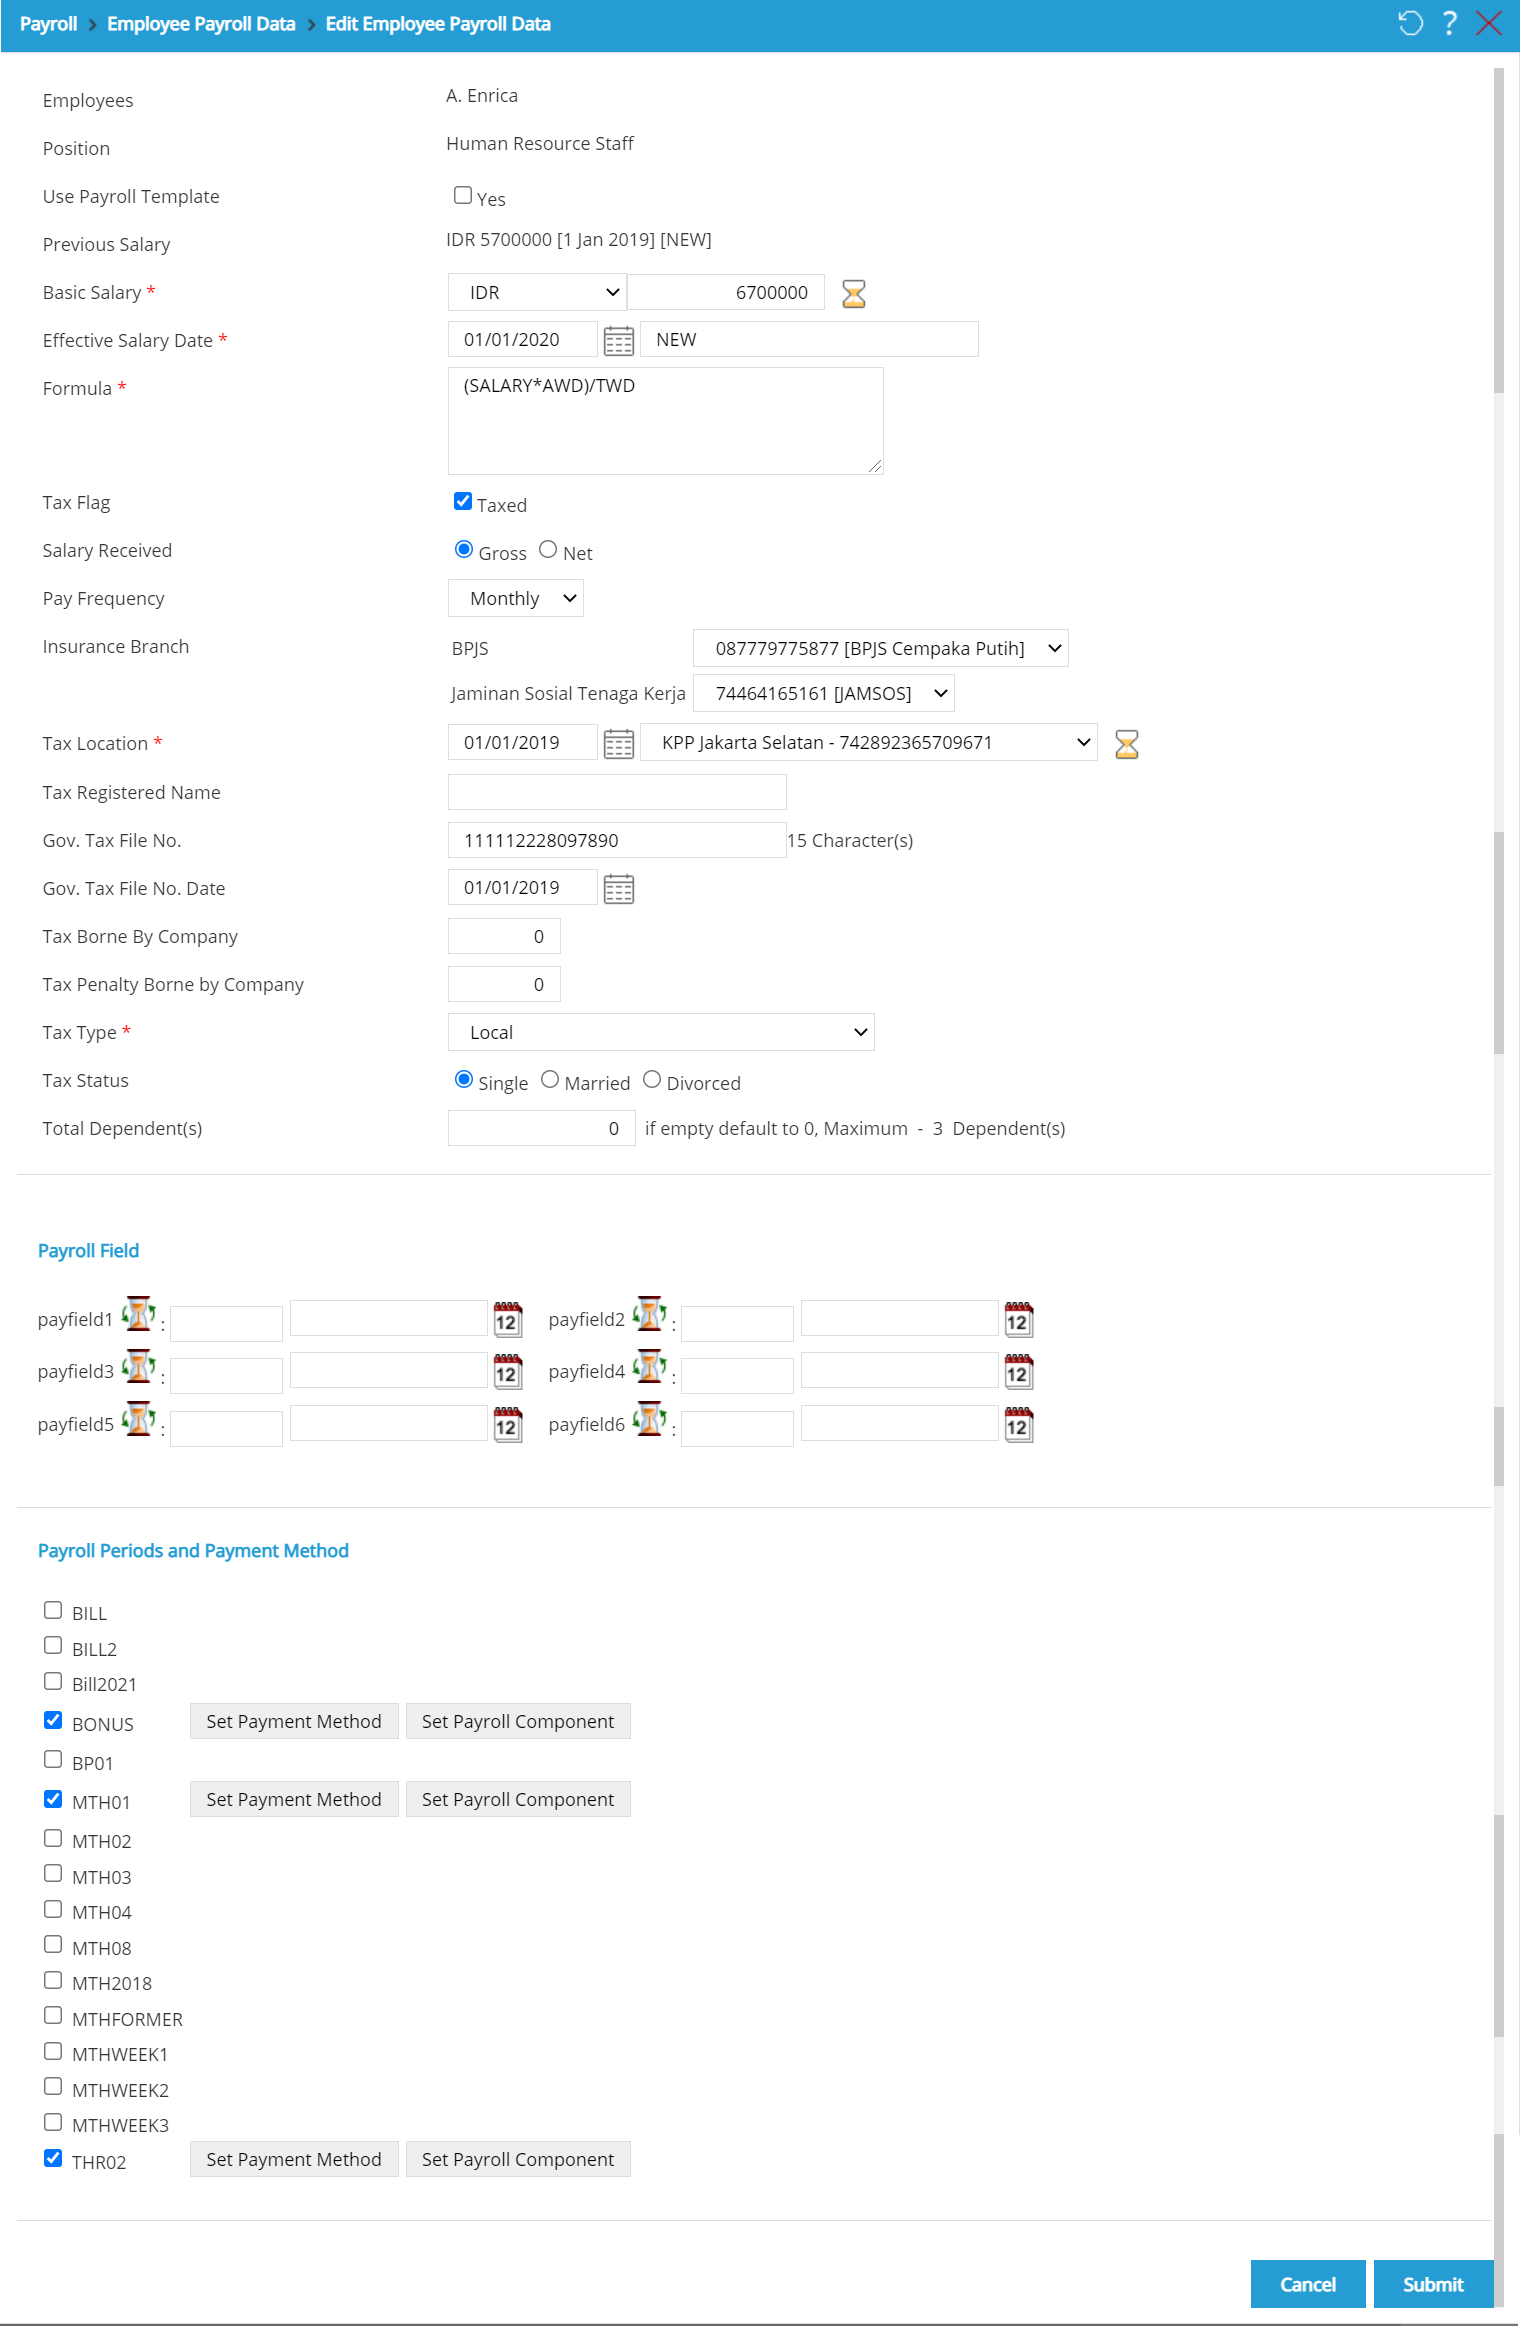
On Edit Employee Payroll Data page, data such as marital status, basic salary, and data which field are still active/normal (e.g., Use Payroll Template, Basic Salary) can be edited. The read-only field (e.g.,Employee,Position) can't be edited.
 From left to right, the example of Normal/Editable field - Disable field - Read-only field.
 To edit the employee payroll data, follow the guide below:
- Employee: It is the employee's name based on the selected employee number.
- Position: It is the employee's position.
- Use Payroll Template: Select "Yes" to use Payroll Template setting for employee's payroll data. Click
 to choose the payroll template setting that will be used. Then, Select payroll Template page will appear as follow.

- Payroll Template: Select the payroll template from available option that has been set in Payroll Template Setting.
- Payroll Data: This part shows employee's payroll data based on the configuration in Payroll Template Setting. For example, select "Payroll Template 001"; then, some data such as Tax Location, Insurance Branch, and Tax Penalty Borne by Company will appear. All data in Payroll Data are used for view-only, it cannot be edited.
- Payroll Field: This part shows the payroll field that has been configured in Payroll Template Setting.
- Payroll Period and Payment Method: This part shows the payroll period and payment method such as payroll period, payroll component, company's bank account, employee's bank account, rounding type, and rounding. At this part, click
 .
.
Click
 to abort using payroll template. Click
  to use payroll template setting.
- Basic Salary: Determine the currency and total basic salary of the employee.
- Efective Salary Date: Determine the effective start date of basic salary for the employee. This effective date can be changed if there is any change on employee's salary such as salary increment.
- Formula: Determine the salary formula of employee. This formula is used to determine employee’s salary based on formula. For example, the grade determines employee’s salary.
- Tax Flag: Select “Taxed” if the salary will be taxed.
- Salary Received:Determine whether the salary received by employee is Net, Gross, with tax Borne by Company, or Gross on Top.
- If Net is selected, then employee receives the component value fully and the tax is borne by the company as allowance.
- If Gross is selected, then the tax is borne by the employee.
- Pay Frequency: Edit the frequency of salary payment, whether per day, per month, or per year.
- Insurance Branch: Determine the insurance branch number for BPJS and Jamsostek used by employee.
- Tax Location: Determine the date and tax location.
- Gov. Tax File No.: Edit government tax file number with minimum 15 characters.
- Gov. Tax File No. Date: Edit the effective start date of the government tax file number by clicking
 and choose the date.
 - Tax Borne By Company: Type “1” if the whole tax borne by company. Type if "0" if the tax is not borne by company. Type “0.5” if half of the tax borne by company.
- Tax Penalty Borne By Company: Type “1” if the whole tax penalty borne by company. Type "0" if the tax penalty is not borne by company. Type “0.5” if half of the tax penalty borne by company.
- Tax Type: Edit the tax type for local employee, foreign employee, expatriate, Fixed Term Non Employee, Insurance Agent, One Off Payment Non Employee, and many more. With the following explanation such as:
- Tax type of Insurance Agent with calculation using PTKP every month if the employee has NPWP then the tax times with tax percentage. If employees have not NPWP then the tax times with tax percentage and 120% of PPH21. The result can preview in Payroll History Report dan Tax Receipt Non Final
- Tax type of One Off Payment Non Employee with calculation no reduction of PTKP, just for Tax Non Final, calculating every month of PPH aren't including before the month of PPH (calculate PPH every month), and no add/reduce payroll component with class 'Pension. The result can preview in SPT Masa
- Tax Status: Edit the tax status whether “Single”, “Married”, or “Divorce”, that will be used in tax calculation.
- Total Dependent(s): Type total of dependent if the employee is married.
- Previous Period: It shows period data before current payroll period. This field will appear if the employee's salary has not been processed.
- Previous Tax Penalty: It shows tax penalty data before current payroll period. This field will appear if the employee's salary has not been processed.
- Previous Tax: It shows tax data before current payroll period. This field will appear if the employee's salary has not been processed.
- Previous Net Income: It shows net income data before current payroll period. This field will appear if the employee's salary has not been processed
Payroll Field
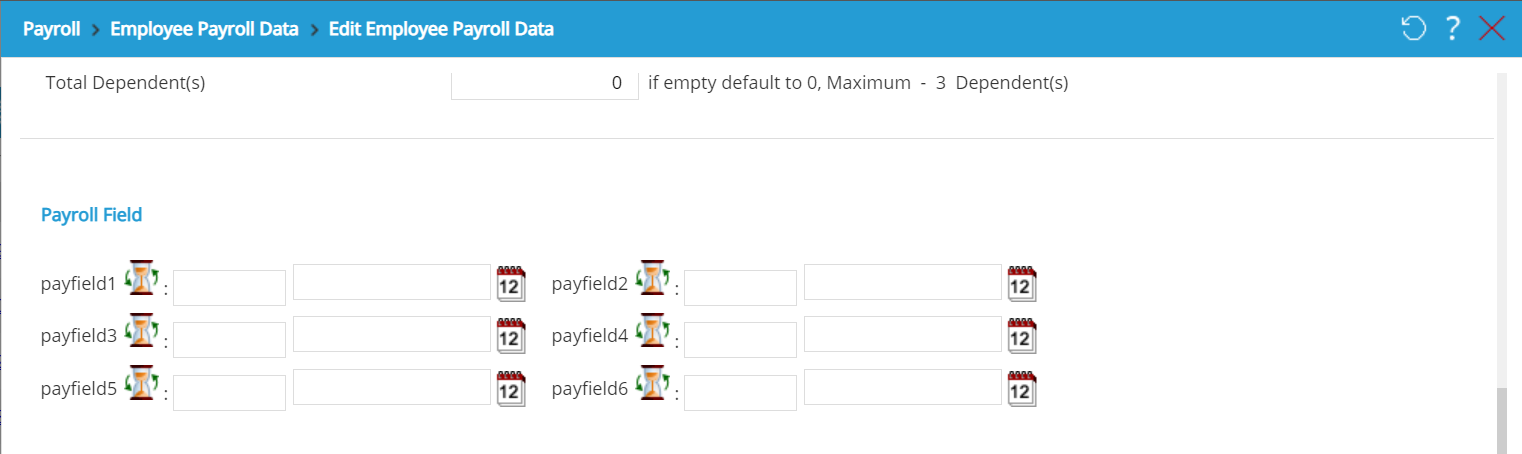
If necessary, fill pay fields with numerical values that later can be used as calculation formula on Payroll Component, Attendance Formula, etc.

Click ![]() to set the effective date.
to set the effective date.

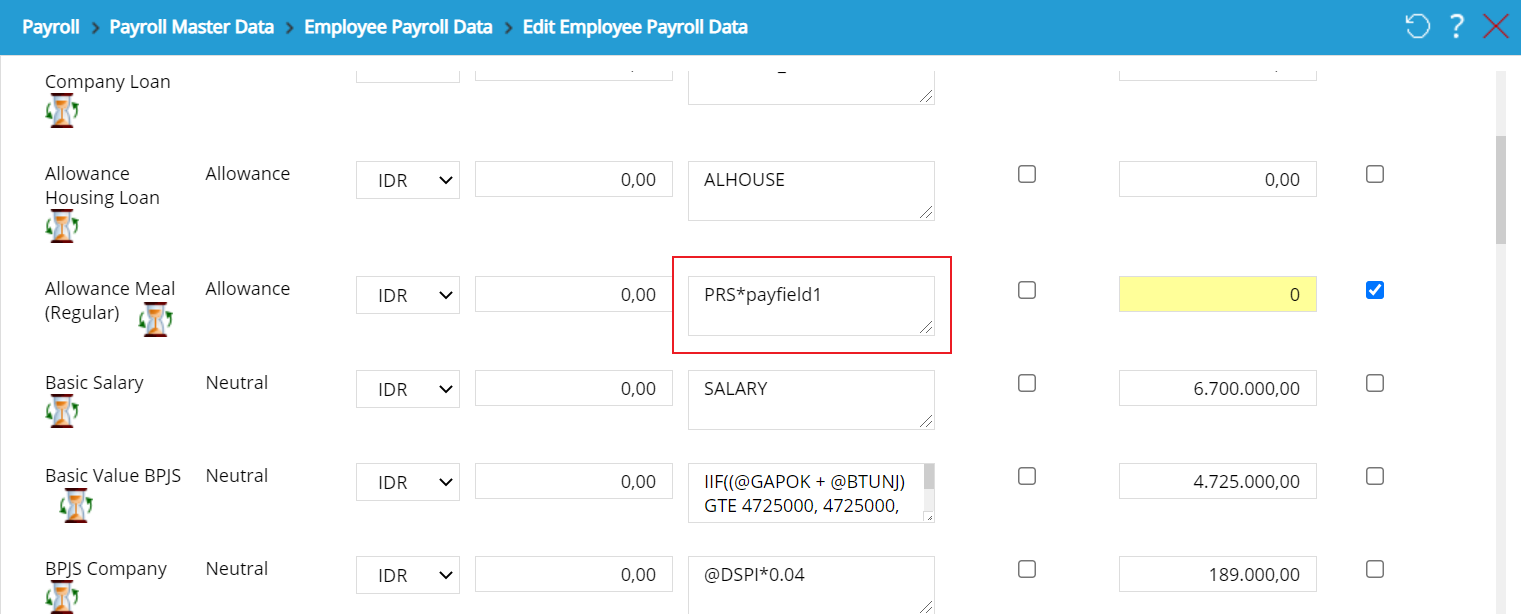
As mentioned before, the Payfield can be used on Payroll Component calculation as follows:
Payroll Periods & Payment Methods

In Payroll Periods and Payment Method, tick the checkbox to select the period, and click  to set the method. The following page will appear:
Do the following steps to arrange payment method setting:
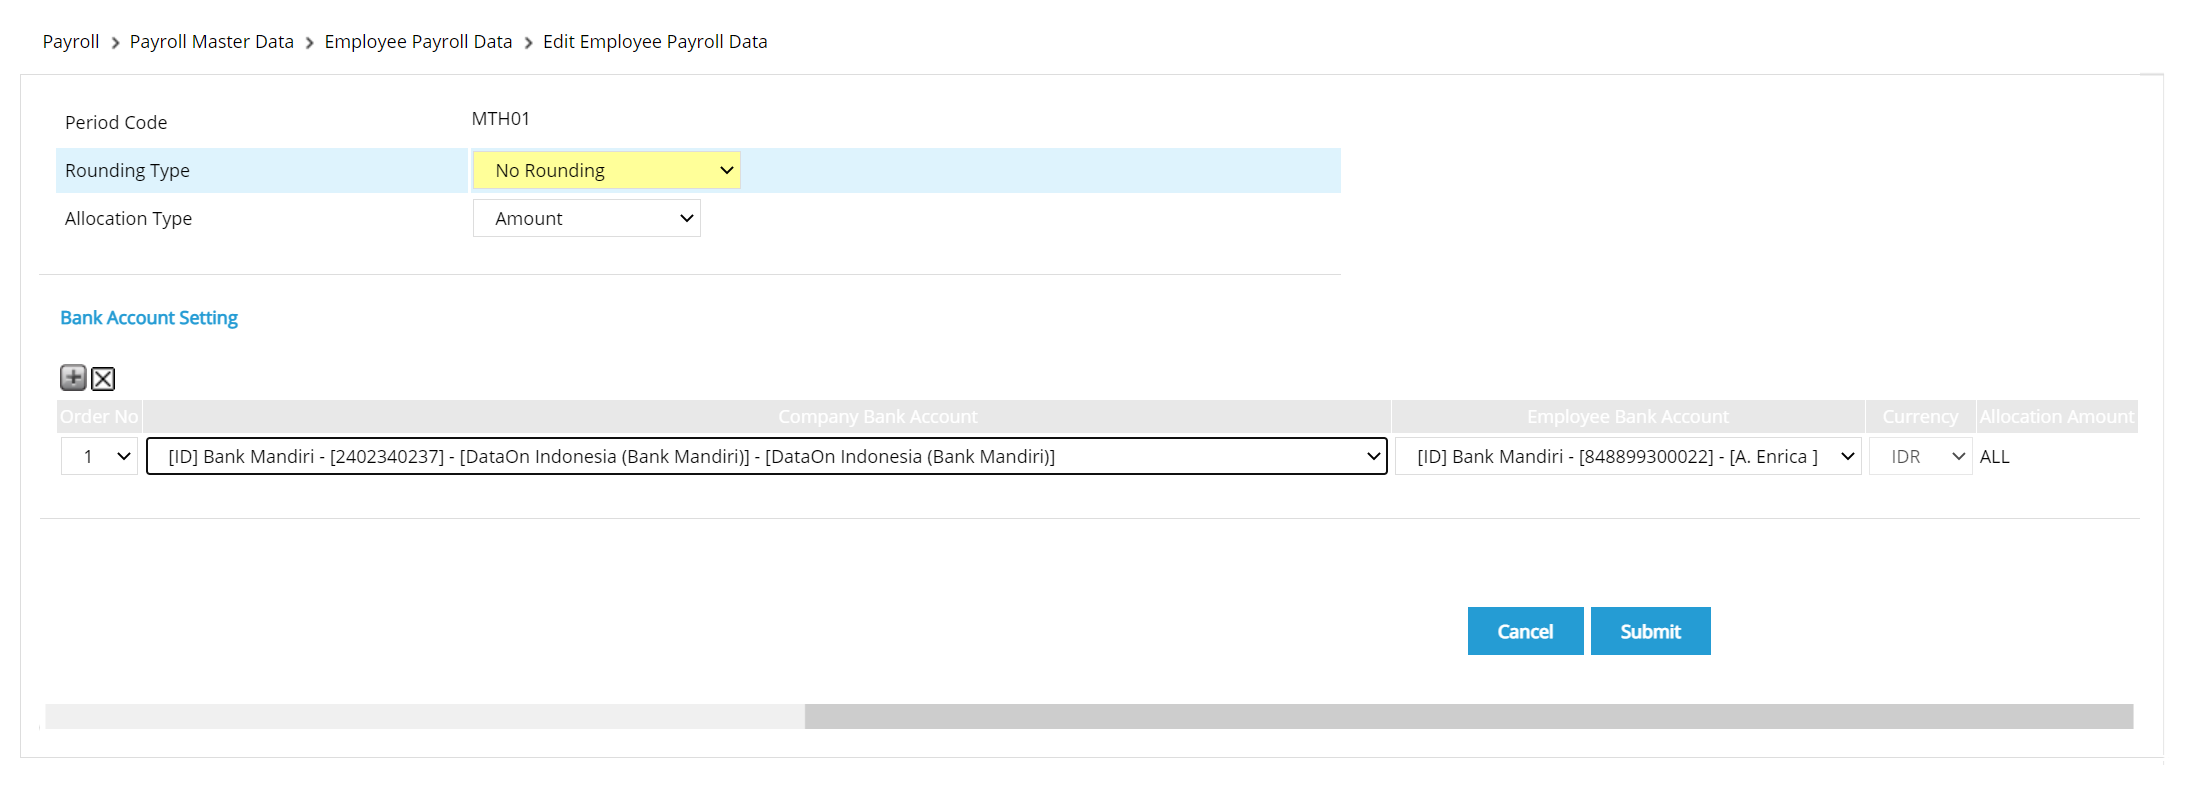
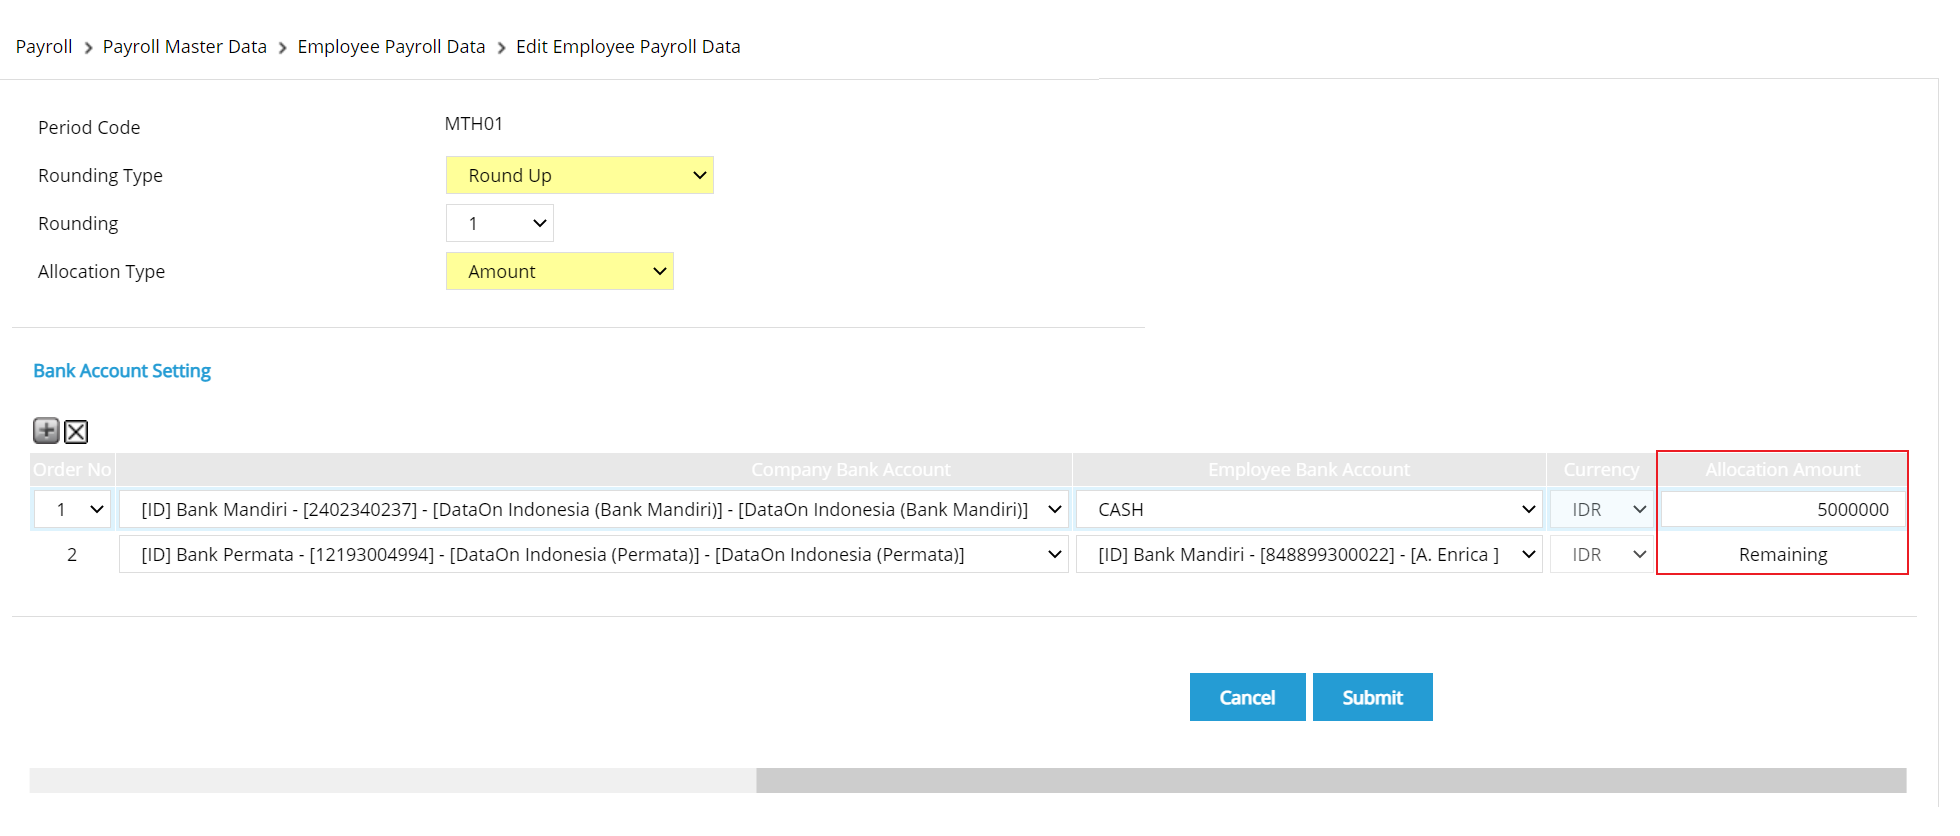
- Rounding Type: Click the dropdown to set the rounding type. There are 5 type of rounding that can be chosen, which are:

- No Rounding:Choose if the amount will not be rounded.
- Accumulated Round Off: Choose to get the amount rounded down to the nearest integer. The decimal leftover will be accumulated to the next payment period.
- Round-Off:Choose to get the amount rounded down to the nearest integer.The decimal leftover won't be accumulated to the next payment period.
- Accumulated Round Up : Choose to get the amount rounded up to the nearest integer.The decimal leftover will be accumulated to the next payment period.
- Round Up:Choose to get the amount rounded up to the nearest integer. The decimal leftover won't be accumulated to the next payment period.
- For further explanation, click https://bit.ly/RoundingType
- Allocation Type: Determine salary payment’s allocation type, whether based on the “Amount”,”Percentage”, or ”Payroll Component”. salary payment can be allocated to different bank account based on the allocation type setting.
If the allocation type is either Amount or Payroll Component and a portion of the payment is disbursed through payment gateway, the allocation amount will be Remaining as follows:
- Click
 to add more row, or click
  to delete row. The selection of allocation type will affect the display of Bank Account Setting. If user selects either "Amount” or “Percentage”, the display will look as the following:

There are some columns that the user must fill, which are: - Company Bank Account: Determine the bank account used by company to transfer the employee's salary. If the company does not use bank account, then the default option will be "cash",
- Employee Bank Account: Determine the bank account used by employee to receive salary. If employee does not use bank account, then the default option will be "cash",
- Currency: Determine the currency used to transfer the salary,
- Allocation Amount: For allocation type of "Amount" and "Percentage", then user can determine the division of salary amount that has to be transferred. The employee can use multiple bank accounts for payroll reception process so that the amount or the percentage of salary segregation that must be transferred to different account number can be set for that employee.
- If user selects "Payroll Component" for the Allocation Type, the page will look like the following.

There are some columns that must be filled: - Company Bank Account: Determine the bank account used by the company to transfer employee's salary. If the company does not use bank account, then the default option will be "cash",
- Employee Bank Account: Determine the bank account used by employee to receive salary. If employee does not use bacnk account, then the default option will be "cash",
- Currency: Determine the currency used to transfer the salary.
- Salary Component: Click
 to determine the salary component used for separating the salary transfer process to the employee's bank account,
 - Allocation Amount: The employee can use multiple bank accounts and components for payroll reception process. Therefore, the percentage of salary separation that must to be transfered to the bank account and the different component for the employee can be configured,
- Split: Click
 to add row if user wants to add split for the used component. User can separate the salary component received by employee, for example, the basic salary sent to another bank account. For example, the employee has two different bank accounts, then part of the component can be allocated to the initial bank account while the rest can be allocated to another bank account.
The system has the configuration of "Block Self-Updating Data" in Global Parameter Setting, where the administrator is able to edit employee payroll data for other employees, but not for their own data. Go to Setting > System Setting > System Parameter> Global Parameter Setting, then tick 'Enable' on Block Self-Updating Data field, then on the Edit Employee Payroll Data page, Payroll Periods and Payment Menthod field will displayed with no fields can be edited.
After editing the data, click  to save the employee payroll data, or click to cancel editing data and go back to Employee Payroll Data index page.
Employee Payroll Data on SunFish Philipines
Particulary for SunFish Philipines, there are additional fields as follow:
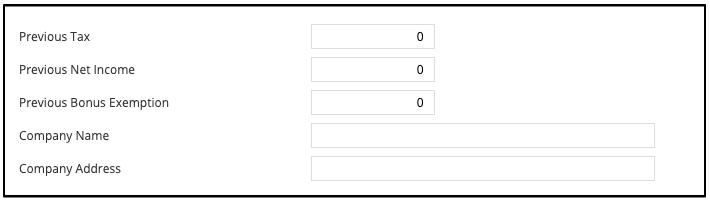
- Previous Tax: It is the employee's previous tax in the previous company.
- Previous Net Income: It is the net icome received by employee in previous company
- Company Name: It is the name of employee's previous company.
- Company Address: It is the address of employee's previous company.
Those fields will appear on Edit Employee Payroll Data page if the employee's salary has not been processed. However, if the employee's salary has been processed, then those fields will appear on Payroll > Edit Past Payroll.
Employee Payroll Data on SunFish Malaysia
Particulary for SunFish Malaysia, there are additional fields, which are the Children Category and Tax Field.
The Children Category is going to look like the following image.

- Total Dependent(s): This field shows total of children according to the number that is submitted on the Children Category table.
- Children Category: Input number of children on "Number of Children (100%)" column, if the user has the children dependent that will be calculated to be fully given of the deduction, or i nput number of children on "Number of Children (50%)" column, if the user has the children dependent that will be calculated to be half given of the deduction.
The Tax Field for SunFish Malaysia is going to looke like the image below.
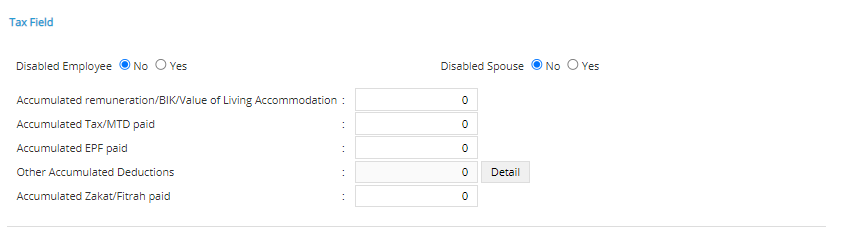
- Accumulated Renumeration: This field shows previous Net income or value of living accomodation.
- Accumulated Tax: This field is filled with the previous tax on a Month to Date basis.
- Accumulated EPF Paid: Users must fill this field with the accumulation of the Employees' Provident Fund (EPF) which is their retirement benefits.
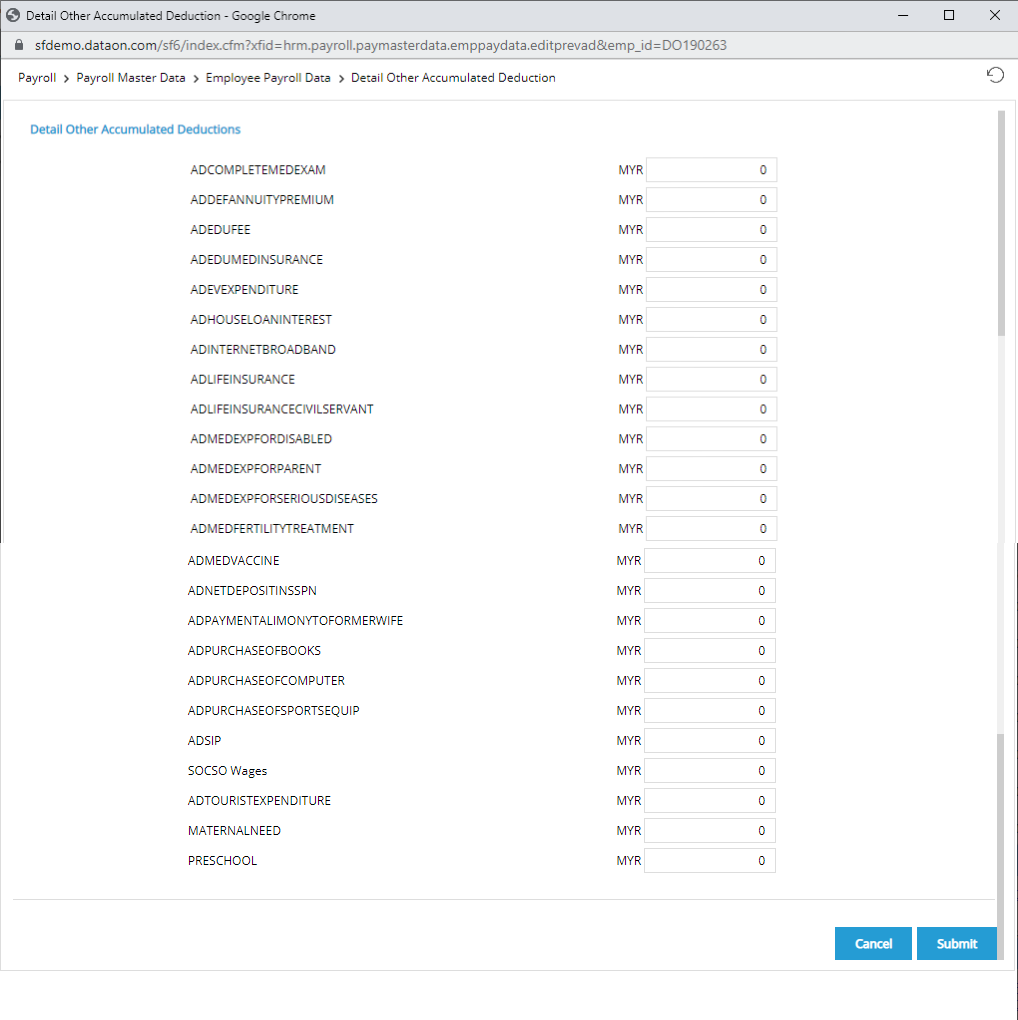
- Other Accumulated Deductions: This field is filled with the number of accumulated deductions if any. Other Accumulated Allowable input will be disabled and only used for displaying total value. When submitted total value will be displayed in the Other Accumulated Allowable input. Also, if you click the
 button, then the following dialogue box will pop up to your screen. Submitted value will not be validated by Tax Exemption Limit. It will be validated in payment process.
- Accumulated Zakat/Fitrah Paid: This field is filled with the accumulation number of Zakat Fitrah payment from certain employees.
Employee Payroll Data on SunFish Hong Kong
The step on how to access Edit Employee Payroll Data for DataOn Hong Kong is the same. However the display is going to appear like the following image:

There are three different sections or fields in DataOn Hong Kong for Edit Employee Payroll Data menu. They are the default form, Payroll Field, and Payroll Periods and Payment Method. To edit employee payroll data in Dataon Hong Kong, users need to complete the following points:
- Employees: Since users click the name of the employee before going to this page, the name of the employee is going to be automatically filled in the form..
- Position:The position is going to be automatically copleted, depending on the employee.
- Use Payroll Template: Tick the 'Yes' box if you wish to use the payroll template.
- Basic Salary: There is a money currency that users can choose and the empty box that the users could use to fill out the nunber of their basic salary based on the selected currency.
- Effective Salary Date: Fill out the effective salary date for the number of the basic salary that has been selected.
- Formula: Based on your selected effective salary date there would appear the formula for that, just click it and continue..
- Pay Frequency: Select whether you wish to edit the payroll data frequency.
- Tax Location: Select the date and the location in which the tax regulation applied.
- Gov Tax File No: It is the applied number of the government's tax file.
- Gov Tax File No. Date : It is the date of the applied number for the government's tax file.
- Tax Type: Select the type of the tax that you wish to change to the employee. Click the drop-down symbol and there ould be some choices you coud select.
- Tax Status: It is the employee's tax status, whether the tax is for single, married, or divorced employee..
- Tax Dependents: It is the total of tax dependents in employee;s family.
- Payroll Fields: It is the employee's payroll fields where they could fill out their payfield from 1 to 6.
- Payroll Periods and Payment Methods: It is the employee's payroll periods and payment methods. There would be some options that users can tick, such as the BONUS and MTH01
After finish editing, users can click the  button to submit the change you have made or click
  button to cancel the edit.
Employee Payroll Data on SunFish Vietnam
The step on how to access Edit Employee Payroll Data for DataOn Vietnam is the same. However the display is going to appear like the following image:

The difference on Edit Employee Payroll Data on SunFish Vietnam is the Tax Flag field on the form. Tick the Taxed box on this field to give the remark that the data is taxed.
Also, the options on the Tax Type provided in SunFish Vietnam are Resident, Non Resident, Expatriate, Contract, and Non Taxed.